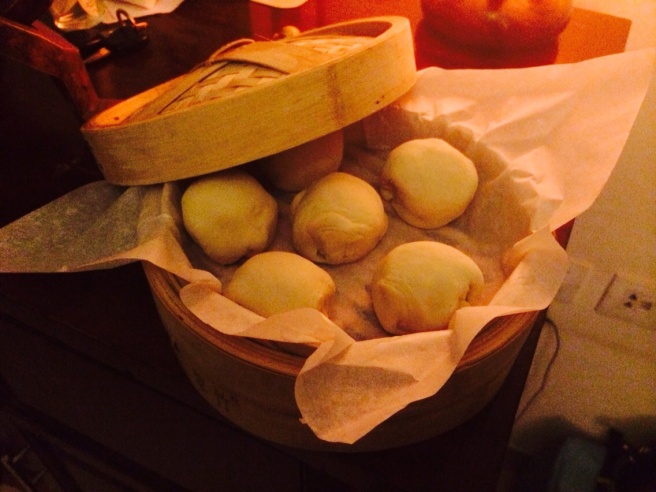
Think Chinese. Think a blast of food. Think Dumplings, steaming hot dumplings. Call them Momos or Dim Sums or dumplings, you immediately imagine healthy aroma wafting through the bamboo basket as you open it to the sight of six pretty fluffy dumplings waiting to be devoured, soft in texture to the taste and mellow in its mix of flavours.
Lai Wong Bao satisfies all these senses. Except, its better because its sweet.
The deal with these buns are that they are steamed, not baked. When cut, it looks like an egg with its yolk shining in the middle.
When I first tried these, it was in an Asian restaurant in Dhaka (of all places, yeah!). I was still with Standard Chartered and it was a welcome dinner hosted by the client in Bangladesh whom we were financing. I still remember the long row of us bankers from all over Europe and Asia dining and talking fancy banking stuff when I looked down at the dessert plate and here it was! The Lai Wong Bao. Gleaming and delicate.
I cooked this up recently in my efforts to try and make some traditional regional desserts. The method is shockingly simple and my best recipe is below.
Notes before the recipe:
- The bun recipe calls for equal quantities (175 grams each) of refined flour and Hong Kong Flour. The latter is important in giving the Lai Wong Bao an extra white look. It is not available in India so I substituted with regular refined flour (Maida).
- The filling recipe calls for Wheat Starch which is essential for giving the grainy texture to the filling. This too is difficult to obtain in India, so I substituted with Corn Starch. It does the trick.
- The bamboo basket preparation usually involves placing the basket in a large skillet filled with water until the 3/4 of the base of the basket.
- Once prepared, keep the buns in an airtight container in the refrigerator. When it’s time to eat again, leave out of refrigerator until it comes to room temperature, then steam again in the basket for 5 minutes.
Ingredients:
For the Bun:
350 grams (3.5 cups) – cake flour or maida. (refer note 1 above)
1⁄4 teaspoon salt
45 grams caster sugar
1 1⁄4 teaspoons instant yeast
160 grams water
10 grams butter
For the Filling:
10 grams custard powder
50 grams corn starch (refer note 2 above)
100 ml milk
50 grams butter
1 large egg, slightly beaten
Method:
Active preparation time: 60 minutes (1 hour) Inactive time: 90 minutes (1.5 hours) Total time from Start to Eat: 150 minutes (2.5 hours)
Mix the flour, salt and sugar and yeast into a bowl. Add water and mix well kneading until the dough is soft. Add butter and continue to knead. The dough will become elastic and smooth. Keep in a slightly oiled bowl and cover with cling film. Keep aside for 90 minutes until the dough doubles in size.
In a saucepan, mix the custard powder, corn starch and castor sugar. Add in milk, and stir mixture over low heat (do not boil) until the mixture is smooth and then add the butter. Once the butter has melted and is mixed well, turn off the heat and stir in the egg. Keep stirring this mix until the mix is a single gooey solid mass. If the filling seems fluid, then keep on low heat and continue to stir till it become a solid state filling. Cool this filling and cover with a cling film and chill in the refrigerator until the dough is ready.
At the end of the 90 minutes, place the dough on to a slightly floured surface and knead again, poking the air out. make small balls out of it, readying it up for rolling. Make small balls of the filling.
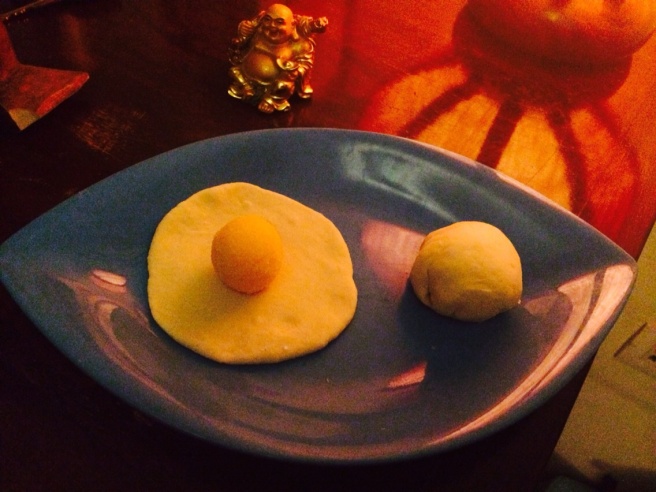
Roll out the dough into small circles, the sides thinner than the centre and place the filling ball in the centre. Wrap to form a nice bun.

Place these on parchment paper and prepare the bamboo steamer basket. Place the buns on parchment paper inside the basket. Cover the basket and leave it aside for 15 minutes.

At the end of the 15 minutes, switch on the heat, and let the basket steam for 15 minutes. Turn off the heat, and leave the basket covered for another 5 minutes.
Open the basket, smell the flavours and delve into your very own Lai Wong Bao.

